
Old or damaged insulation in the attic can create serious problems inside a house and across the entire property. Dust, allergens, moisture, and contaminated materials often build up over time, creating health risks for homeowners and their family. Safe attic removal services provide a controlled solution to remove insulation without spreading debris through the home. This procedure protects indoor health, improves energy efficiency, and prepares the attic for replacement, replacing, or install work after removal. Insulation removal is often required after rodent infestations, water damage, or during renovations, as these situations can compromise insulation integrity and pose health risks. Professional services are aware of these issues and can identify and address them during the removal process. Professionals lead the project from initial assessment to completion, ensuring every step is managed efficiently. They can also identify underlying issues such as structural damage, water leaks, or pest entry points, and recommend necessary repairs before installing new insulation.
Professional safe attic insulation removal services follow a strict step-by-step process from the beginning of the project to the final clean stage. Each job focuses on safety, proper equipment, and keeping the site contained. The focus remains on prioritizing cleanliness and safety throughout the entire process. All work is performed in compliance with building code to ensure safety and proper standards. This guide explains how insulation removal works, including preparation, containment, disposal, and post-clean, so homeowners understand what happens inside their house.
Why Safe Insulation Removal Matters
Insulation removal is not a basic cleanup job. Old insulation may contain dust, mold spores, rodents, vermiculite, moisture, smoke damage, or water damage. Disturbing these materials can cause transfer of contaminants through walls, doors, and window openings, increasing health risks throughout the entire home. Signs that insulation needs to be replaced include uneven temperatures, drafts, and increased utility bills.
Professional insulation removal uses sealed containment to protect the property. This removal method keeps dust and mess to a minimum and ensures insulation is removed safely and completely. Skipping professional help often leads to lingering odors, ongoing water exposure, and poor indoor air quality.
When Insulation Removal Is Necessary
Certain circumstances require insulation removal as a priority:
- Severe water damage from roof leaks or storms
- Smoke damage after a fire
- Pest activity from rodents
- Renovation or remodeling projects
- Presence of vermiculite
- Preparation for replacement insulation
Wet insulation loses its ability to save energy. Water intrusion causes mold growth and structural damage, making removal the only safe solution in many circumstances.
Step 1: Initial Attic Inspection and Assessment
Every project begins with an inspection of the attic, including the attic access opening, ventilation, and accessible areas. Professionals evaluate insulation type, contamination, presence of vermiculite, and water exposure.
Homes built before 1990 often require asbestos testing when insulation disturbance is planned. This beginning step helps define insulation categories and confirms the safest approach to remove material. It also identifies leaks, pest entry points, or water damage that must be addressed before replacing insulation.
Step 2: Preparing the Work Area
Preparation protects the house, property, and occupants. Entry points near the front door, interior door, and window areas are sealed. Protective coverings are placed along access paths to prevent dust transfer.
This stage limits mess, keeps the site organized, and ensures equipment remains outside the living space. The industrial vacuum system used for insulation removal is located outside the home to minimize dust and contamination during the removal process.
Step 3: Containment Setup
Containment is critical during insulation removal. Barriers isolate the attic from living spaces, and negative-air systems maintain control.
Vacuum hoses are routed carefully through the attic access opening, allowing insulation to be removed without contaminating the entire home.
Step 4: Personal Protective Equipment and Safety Controls
Crew team members wear chemical-resistant coveralls, gloves, and high-quality respirators. This safety equipment reduces exposure to fiberglass, vermiculite, smoke residue, and biological hazards.
Each job is handled by equipped, trained professionals who are committed to safe work practices and complete protection.
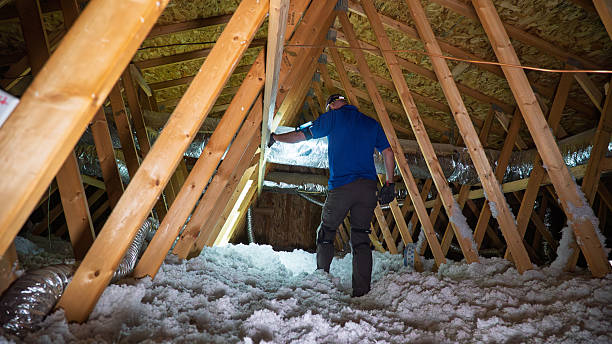
Step 5: Insulation Removal Process
During the removal phase, loose-fill and old insulation are extracted using industrial vacuum systems and vacuum hoses. Batt insulation is lifted and sealed. Professionals are experienced in removing a combination of insulation types, such as batt and blown-in, ensuring thorough and efficient service during renovation or remediation projects.
The team works carefully to remove material without damaging wiring or framing. All insulation removed is bagged immediately to prevent dust release.
Hiring professionals is critical when hazardous materials like asbestos or mold are present in attic insulation.
Step 6: Proper Disposal of Removed Insulation
All insulation removal includes regulated disposal. Bagged material is transported from the site according to state and local requirements.
Proper handling of water-damaged or smoke-damaged insulation prevents environmental contamination and protects the property.
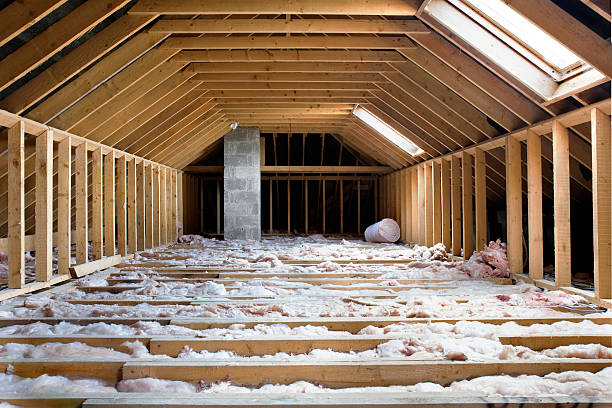
Step 7: Attic Surface Cleaning
After removal, surfaces are thoroughly cleaned using HEPA-filter shop vacuums. Remaining dust, residue, and contaminants are removed.
If rodents or moisture were present, sanitizing treatments are applied to rid the attic of bacteria and odors. This clean stage prepares the attic for replacement insulation or install work.
Step 8: Post-Clean Inspection and Verification
A final walkthrough confirms the attic is clean, dry, and free of debris. Any remaining presence of moisture or contamination is addressed before closing the project.
Step 9: Preparing for Next Improvements
Once the process is complete, the attic is ready for replacement, replacing, or air sealing upgrades. Many homeowners choose bundled solutions to reduce finance costs and improve long-term performance.
Benefits of Safe Attic Insulation Removal Services
- Reduced health risks
- Cleaner home and property
- Better energy reduction
- Safer water management
- Less mess across the entire home
- Complete compliance with safety codes
Why Professional Removal Is the Best Choice
DIY insulation removal increases exposure to contaminants. Professional professionals use advanced equipment, sealed containment, and trained team members.
This approach ensures insulation is removed safely, clean, and in full compliance with safety standards.
Equipment, Experience, and Trusted Providers
Professional contractors use specialized equipment designed to minimize mess and contamination.
Eco Insulation uses a high-performance insulation vacuum and offers insulation removal services at competitive rates, including free quotes.
Reitzel Insulation brings over 47 years of experience and uses powerful industrial vacuum systems for insulation removal.
Both companies emphasize safety, thorough cleanup, and professional handling of hazardous materials such as vermiculite or asbestos.
Professional Standards, Safety Measures, and Cleanup Practices
A professional insulation removal service must include a thorough cleanup once the insulation has been removed. This involves vacuuming remaining dust and debris using a HEPA-filtered shop vac and sanitizing the attic if pests were present. These steps are essential to protect indoor air quality and ensure the attic is safe for new insulation.
Professional crews wear full personal protective equipment, including chemical-resistant coveralls and high-quality respirators. This safety gear allows technicians to safely handle irritating fiberglass, biohazards, and contaminated materials. Sealed containment zones and HEPA-filtered negative-air equipment are also used to prevent airborne contamination during insulation removal.
Old insulation must be disposed of according to local regulations, which professionals manage as part of their service. Proper disposal is especially important when insulation has been affected by water damage, smoke damage, or rodent infestations, all of which can compromise insulation performance and create health risks.
Choosing the Right Removal Team
Select a company with experience, warranties, and a dedicated office, ensuring they have subject matter expertise in safe attic insulation removal services. Reliable providers clearly explain the message, using the right words to outline the process and provide contact options by phone or online so homeowners can hear answers directly.
Conclusion: Start with Safe Removal
Insulation removal is the foundation for a healthier house. Safe attic insulation removal services follow a controlled process that protects the family, structure, and indoor health.
From containment to final clean verification, every step matters.
Contact a professional company today to remove insulation safely and prepare your attic for lasting performance.
Contact Us
Ready to enhance your home’s comfort and energy efficiency? Get in touch with The Same Guys Insulation today at [647-453-7037] to schedule an assessment and discover how we can transform your home into a more eco-friendly and comfortable space.
- 647-453-7037
- info@thesameguysinsulation.com
- Mon - Fri 9:00 - 18:00
Get A Quote